BRIC resources
Computing
From 30th April 2026 all BRIC computing will be provided from the university’s high-performance computing cluster (HPC). Existing virtual machines hosted by Azure will subsequently be decomissioned.
The school of psychology owns a multi-user 64-thread Linux workstation with 2 GPUs, DeepSim, managed by Andy Wills.
For more information and request access, see this page
HPC for BRIC VM users
Lovelace is the name of Plymouth University’s High Performance Computing facility. The name comes from Ada Lovelace a pioneer in computing and someone often considered the first computer programmer.
Key points to note about the BRIC migration from Azure to HPC
All computing activities will be provided by HPC.
Target date for Azure VMs to be decomissioned is 30th April 2026.
Since Mid October 2025 all new MRI data has also been written to HPC.
Older MRI data will only be moved to HPC on request.
Teaching LABs will migrate to HPC for the start of 2026-2027 teaching year.
HPC support
The HPC support team can be contacted using - hpcsupport@plymouth.ac.uk
They offer regular drop-in sessions for group or individual support and training.
Lovelace wiki
The HPC team have a very expansive wiki providing an excellent introduction to the lovelace cluster, its features and how to use it.
https://docs.lovelace.plymouth.ac.uk/private/user-guide/connecting
and further useful public documentation,
Request HPC resources and accounts
The application form is for requesting computing resources for a single project. It will need to detail project collaborators, for whom accounts will be created once the request is approved and processed.
Apply for HPC computing resources - https://www.plymouth.ac.uk/facilities/high-performance-computing
Seedcorn Account
A seedcord account will last for 3 months and only privides access to the shared CPU & memory resources, primarilary for familiarisation with the HPC ahead of funded work.
Project Account
A project account is needed to access the paid for resources and essential for BRIC research activities on HPC.
When completing the application form, please ensure the following basic information is included.
BRIC project code
Name of the Principle Investigator
A human readable title of the project
Estimate of core hours (CPU resources), figures below as guide
Small - 10,000 (equates annually to 7 days of 24 hours processing on 4 cpus per month)
Medium - 50,000 (equates annually to 14 days of 24 hour processing on 8 cpus per month)
Large - 100,000 (Any project of this size should be discussed with HPC support in advance of making an application)
BRIC data on HPC
Since November 2025 a copy of all new MRI data collected has been sent to HPC. Older MRI data and project data will be copied to HPC on request only. Contact paul.greening@plymouth.ac.uk to discuss your requirements.
Personal data saved to /media/MY-DATA or /home/Researcher on your Azure VM will also only be copied on request.
MRI
MRI data from the scanner will appear under the BRIC project code i.e. HP-GreeP_IT-DDMMYY in:
/scratch/BRIC/DATArepo
Note
The underscore in the project name - this is a difference from how the data is seen on a VM where it is a hyphen.
Research
Research data for individual projects will appear in:
/scratch/BRIC/PROJECT-DATA/projectname
Personal
Personal storage will be an individual home directory:
/users/username
BRIC permissions and groups on HPC
Each new BRIC project will be allocated an HPC project code (format pnn) as part of the initial setup on HPC. The request will also include the PI and project collaborators, that will be added to HPC group pnn. As administrator of BRIC data on HPC, user bricadmin will by default be added to all BRIC projects.
DATArepo
The folder for each individual project will be assigned group ownership of the HPC project code, the group stickybit will also be set to ensure all new files inherit the correct group. This ensures only members of the HPC project have access:
drwxr-s---+ 4 bricadmin p1234 4096 Oct 28 2035 HP-BriC_AA-310927
Note
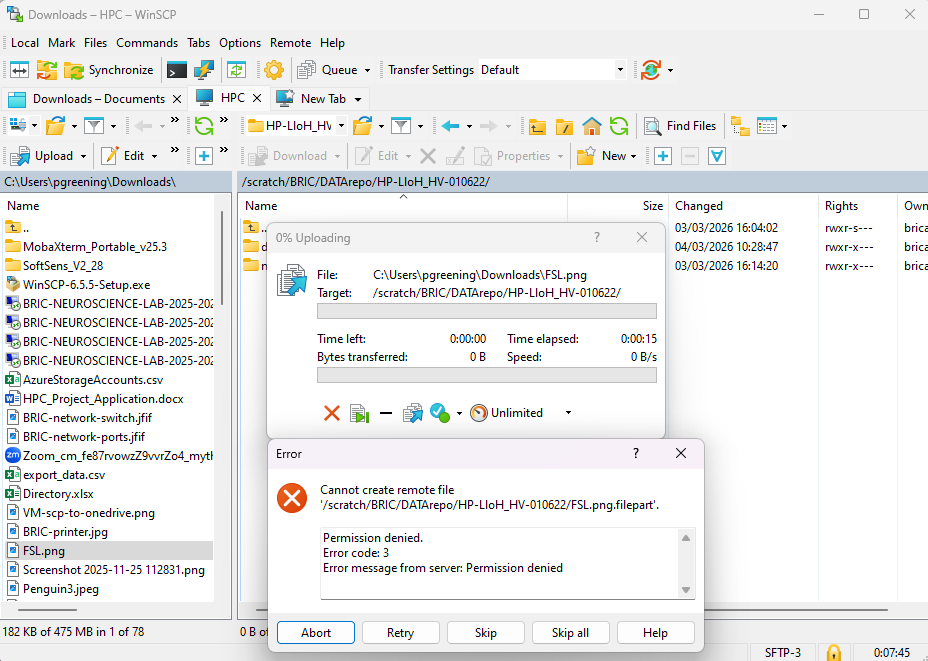
All data in DATArepo is read-only.
PROJECT-DATA
The folder for each individual project will be assigned group ownership of the HPC project code, the group stickybit will also be set to ensure all new files inherit the correct group. This ensure only members of the HPC project have access:
drwxr-s---+ 4 bricadmin p1234 4096 Oct 28 2035 HP-BriC_AA-310927
NB shared project data will potentially allow any member of the project to edit/rename/delete depending on the group permission set. New data added to the project folder will be owed by the creator and may not inherit the project group, in this scenario it is the owner who will need to make the data accessible to other team members. This can be achieved by changing group ownership and permissions as required.
Remote access to data on HPC
Remote access from a University or personal computer is possible using secure copy (SCP) or mounting data as a local drive.
SCP
Using the SCP command to download a file from HPC:
scp username@lovelace.plymouth.ac.uk:/users/username/filename.txt ./filename.txt

Mount as local drive
MAC
Setup ssh keys from your device to HPC as outlined here,
Install sshfs as per,
Create a folder called HPC under your home directory on your MAC.
Then from a command line on your MAC:
sshfs username@lovelace:/users/username /Users/paul/HPC
WINDOWS
One option is to use WinSCP, other similar products are available.
Open WinSCP on your device and setup a New Site connection for HPC, adding Hostname and User name.
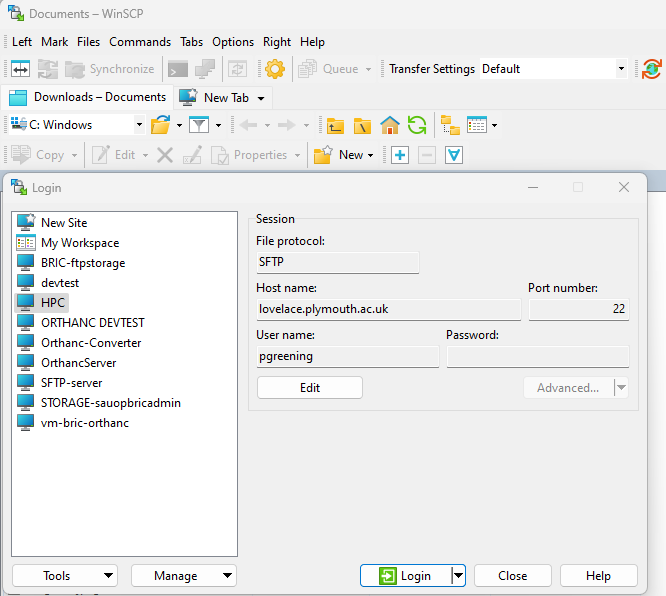
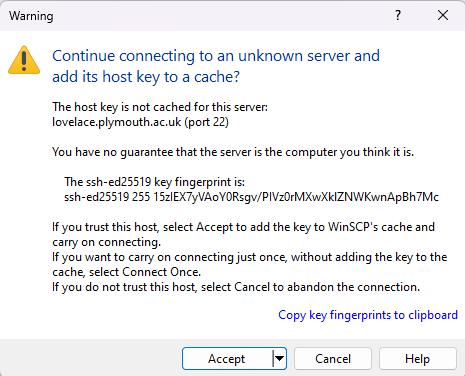
At the first time of connection only you will need to Accept the host key.
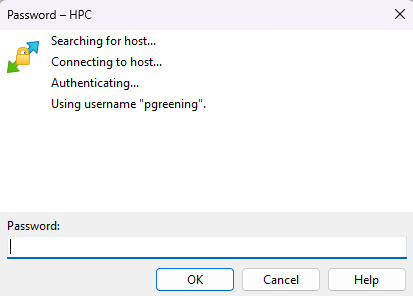
You will then be prompted for you HPC password.
You are now logged in to HPC and can navigate to your desired folder.

You can use the Advanced Site Settings to define which remote directory you want to be in on connection and also to remember the last used directory.
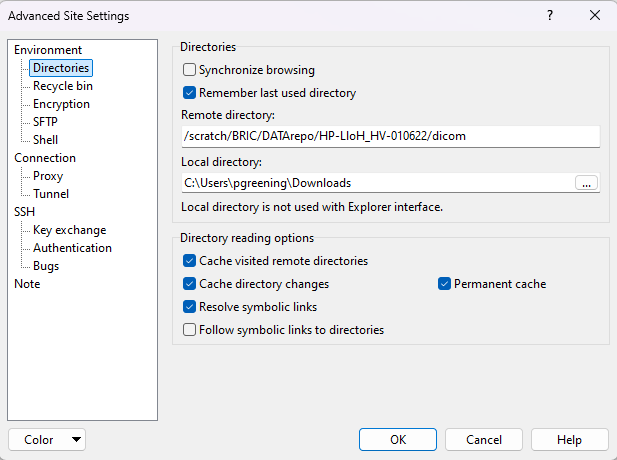
Download or upload files as required.
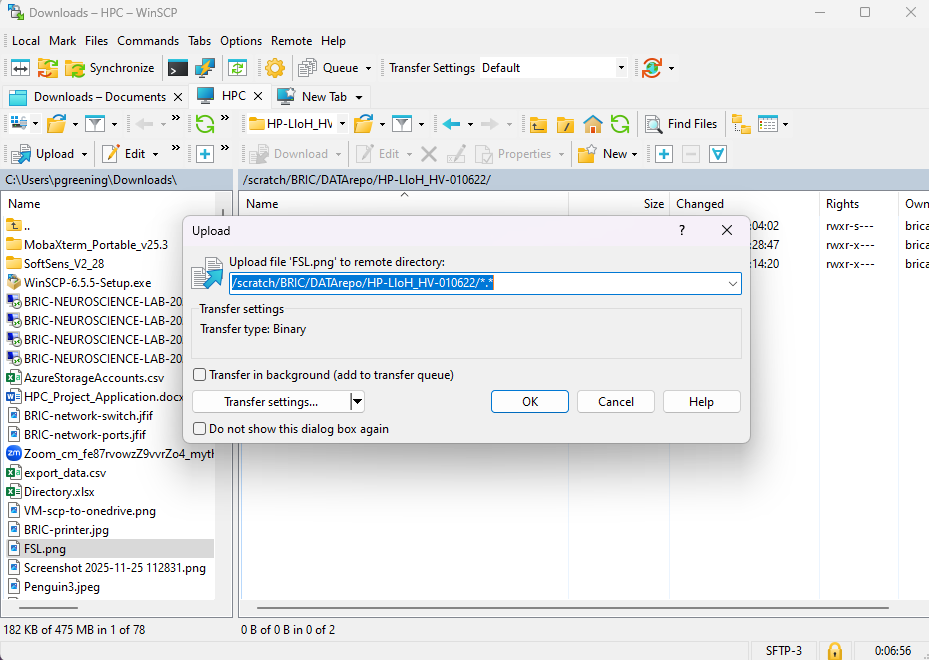
N.B. DATArepo is read only in this example.
BRIC Data Security
The information below sets out how BRIC data is sent to and configured on HPC.
Setup on Orthanc
The azure VM DIST-6-503 runs Orthanc software and is commonly referred to as the Orthanc server. The Orthanc server recieves data sent from the MRI scanner and temporarily stores this data in an internal database before writing out to two local connected Azure storage accounts, nominally DICOM0 for longterm storage and REPO0 for readonly access. Specific project data under REPO0 is connected to Researchers Virtual Machines to allow analysis.
Since November 2025 Orthanc has been set-up to send a second copy of REPO0 to HPC. This is configured in file WriteToDisk.lua
Orthanc has sshfs installed and subsequently a share from HPC (/scratch/BRIC) has been mounted to /media/LOVELACE using bricadmin credentials.
Setup on HPC
On HPC the raw MRI data appears under:
/scratch/BRIC/DATArepo
with each BRIC project having its own folder.
The folder /scratch/BRIC/DATArepo is owned by bricadmin with the group stickybit set so new subfolders inherit the bric group:
drwxr-s---+ 29 bricadmin bric 4096 Mar 24 16:00 DATArepo
The automated process that writes this data from the Orthanc servers means there should be no further configuration needed.
Note
All BRIC users on HPC need to be added to the bric group to allow access.
This section describes the automated dicom to nifti process on the HPC. This is in addition to the existing process for data written to the Azure VM DIST-6-503, they are distinct processes working on separate copies of the raw data.
When data collection for a participant is complete a file will be created in:
/scratch/BRIC/orthanc/orthanc-outstanding-conversions
Example filename - HP-GreP_IT-010489.ABCD1234_20260104
Representing the BRIC project code, participant ID and date. Project code is 1st letter of faculty (e.g. H for health), 1st letter of school (P for psychology), 1st three letters of PI’s last name and 1st letter of first name, 2 letters for study (OL of observational learning), start date.
Scheduled under cron of user bricadmin is a script which is regularly checking for the presence of these files:
05,15,25,35,45,55 * * * * sbatch /scratch/BRIC/orthanc/Check-For-Outstanding-Conversions.sh >/dev/null 2>&1
10,20,30,40,50,00 * * * * sbatch /scratch/BRIC/orthanc/Check-For-Outstanding-Conversions.sh >/dev/null 2>&1
When new participant data for conversion is detected a further script to run the conversion is executed:
/scratch/BRIC/orthanc/Convert-DICOM-to-NIFTI.bsh
Software prerequsites for this script are dcm2niix and heudiconv, which are installed on HPC. Logs from the conversion process can be found in:
/scratch/BRIC/orthanc/conversion-logs
Individual project data is located in:
/scratch/BRIC/PROJECT-DATA
N.B. Each approved HPC project will also be allocated an HPC project code Pnn, with an associated project folder of /scratch/pnn. The longterm aim is to link the BRIC project folder to the HPC project folder.
Azure Cloud Overview - Azure VMs will be decomissioned by April 30th 2026
All computing resources for BRIC are hosted in Microsoft’s Azure Cloud, charged on a “pay as you go” basis, it is therefore essential your research VM is running when required and shutdown/deallocated at all other times.
There are four key steps in accessing and using your VM.
Your VM needs to be activated.
You need to be on the UoP network directly or connected via VPN.
Connect/login to your active VM.
When your work is complete your VM needs to be shutdown and deallocated.
The options of how to do this from Windows, Linux and Mac systems are outlined in the sections below. At the end of this document is a summary of Azure commands for quick reference.
Virtual Machine (VM) concepts
Your virtual machine is provisioned with Azure Storage accounts connected as defined in your initial request to build it. Please use these storage accounts for your research data, software and documents in preference to storing data locally on the internal disk (i.e. /home). This is important to understand because - should a problem arise with your VM that needs it to be rebuilt, all data on the internal disk will be lost. Storing data on the internal disk also has the potential to reduce performance of the VM and will in extreme cases cause it to crash or fail to start.
Landscape Diagram
This is a basic visual overview of how the key components in and around Azure are related to each other.

Managing your VM on Windows
Start/Stop from a Web browser
Login to the Microsoft ARM Portal using your preferred web browser. The credentials required will be you UoP id and password. Once logged in, select “virtual machines” from the left hand column, you will then see your VM listed, from where it can be started/stopped

Note
The VM status of “Stopped (deallocated)”, is always the required status when your VM is not being used.Check the tick-box next to your VM name, then use the start or stop icon from the options across the top of the page. When your VM status changes to running, it may take a further minute for the network to initialise before allowing remote connections.
Start/Stop from a command line prompt
Pre-requisites
There are two pre-requisites to enable managing your VM from the Windows command line,
Windows Powershell modules. (Sould come as part of the standard TIS desktop).
Azure Powershell modules. (install guide here)
Connect to your Azure Account.
With the pre-requisites in place you need to connect/authenticate your account with azure. Open a Powershell terminal, and run command:
Connect-AzAccount

This will then open a browser window for you to enter your userid and password. You may also need to completed two factor authentication (2FA).

Once authentication is complete, back on the console window you will see the subscription you are now connected to. You may have multiple Azure subscriptions, so ensure it is the Brain Research Imaging Centre subscription that is showing. To set the default subscription to BRIC:
Select-AzSubscription -SubscriptionId 'xxxxxxxx-xxxx-xxxx-xxxx-xxxxxxxxxxxx'
Where xxxxxxxx-xxxx-xxxx-xxxx-xxxxxxxxxxxx is the BRIC SubscriptionId. To list available subscriptions:
Get-AzSubscription
This will give you the Id of the BRIC subscription to use if needed.
Start your VM
Now you can start your VM with the following command syntax:
Start-AzVM -Name XXXXXXXXX -ResourceGroupName YYYYYYYYY
Where XXXXXXXXX is the name of your VM and YYYYYYYYY is the Azure Resource Group it belongs to.
Stop and deallocate your VM
To stop your VM:
Stop-AzVM -Name XXXXXXXXX -ResourceGroupName YYYYYYYYY
Where XXXXXXXXX is the name of your VM and YYYYYYYYY is the Azure Resource Group it belongs to.
Query status of your VM
To query the status of your VM:
Get-AzVM -Name XXXXXXXXX -ResourceGroupName YYYYYYYYY
Where XXXXXXXXX is the name of your VM and YYYYYYYYY is the Azure Resource Group it belongs to. Example output from these commands,

Connect to your VM - Command line
None of the Research VMs are in DNS so access will require knowledge of the correct IP address. Access is via secure shell (SSH) connections. There are two options, either direct from the windows command line or via a 3rd party terminal emulator.
From a windows command line (not PowerShell)
ssh -l Researcher www.xxx.yyy.zzz
Where www.xxx.yyy.zzz is the ipaddress of your VM
The first time you connect respond Y to the prompt confirming the connection. You now have a terminal open to your linux research VM. A basic knowledge of linux commands and the vi editor would be beneficial before using the command line. Regular users of the command line should consider the PuTTy terminal emulator.
From a windows Terminal Emulator (PuTTy)
There are many terminal emulators available for this purpose. My preference is PuTTy details of which are available from the University Work at Home sharepoint site. Once Putty is installed you can save connection settings and customisations of the terminal session. You are also able to create and save access keys to allow password less access from your device.
Connect to your VM – Desktop Environment
Access to the desktop environment is via Remote Desktop Protocol (RDP). RDP provides a GUI desktop environment for running commands and applications that have a graphical interface, i.e. MatLab. Open the Remote Desktop Connection App, and enter your VM ip address,

Which will prompt you to confirm you want to proceed,

You will then be prompted for your VM username and password (Not your UoP username and password),

Managing your VM on Linux
Start VM from Web browser
Login to the Microsoft ARM Portal using your preferred web browser. The credentials required will be you UoP id and password. Once logged in, select “virtual machines” from the left hand column, you will then see your VM listed, from where it can be started/stopped
Note the VM status of “Stopped (deallocated)”, this is always the required status when your VM is not being used.
Check the tick-box next to your VM name, then use the start or stop icon from the options across the top of the page. When your VM status changes to running, it may take a further minute for the network to initialise before allowing remote connections.
Start VM from Linux Command Line
Pre-requisites
Installing the Linux Azure Client is a pre-requisite to being able to manage VMs from the linux command line. Details of the installation for linux can be found here.
Connect to your Azure Account
Connect using this command, you will be prompted to enter your UoP credentials:
az login
This will open a browser window for you to enter your userid and password. You may also need to completed two factor authentication (2FA).
If you are connected remotely to a linux machine or working on one that does not have a desktop environment, you will get a prompt like this,

Open a web browser and enter the code provided,

You will then be prompted to enter your UoP credentials,

Once login is successful,

You can then return to you command prompt where you will be connected,

You may have access to other Azure subscriptions which will be listed at login. You can list your subscriptions with:
az account subscription list
Using the output from the command above you can set the BRIC subscription:
az account set -s xxxxxxxx-xxxx-xxxx-xxxx-xxxxxxxxxxxx
After which you can confirm which account you are connected to with:
az account show
Start Your VM
Start your VM with:
az vm start --resource-group YYYYYYYY --name XXXXXXXX
where YYYYYYYY is the resource group of your VM and XXXXXXXX is the name of your VM. Note the double hyphen preceding resource-group and name.
Stop and deallocate your VM
To stop and deallocate your VM:
az vm deallocate --resource-group YYYYYYYY --name XXXXXXXX
Connect to your VM - Command Line
From the linux command line using SSH:
ssh researcher@your.vm.ip.address
From a terminal emulator such as PuTTy, which is available for install from the software repository or from a command line:
sudo apt-get install putty
Once installed open the PuTTy application and configure connection setting as needed.
Connect to your VM – Desktop Environment
Firstly, you need a terminal emulator installed, in this example remmina is used. Either install from the software repository or from the linux terminal window, run these commands:
sudo apt-add-repository ppa:remmina-ppa-team/remmina-next
sudo apt update
sudo apt install remmina remmina-plugin-rdp remmina-plugin-secret
Once installed, open the emulator, which is this icon,

and configure the connection settings.
Managing Your VM on MacOS
Start VM from Web browser
Login to the Microsoft ARM Portal using your preferred web browser. The credentials required will be you UoP id and password. Once logged in, select “virtual machines” from the left hand column, you will then see your VM listed, from where it can be started/stopped
Note the VM status of “Stopped (deallocated)”, this is always the required status when your VM is not being used.
Check the tick-box next to your VM name, then use the start or stop icon from the options across the top of the page. When your VM status changes to running, it may take a further minute for the network to initialise before allowing remote connections.
Start VM from Mac Command Line
Pre-requisities
Install Home Brew - Details can be found here.
Install Azure client.
install azure-cli
Upgrade Azure client.
Az Upgrade
Once pre-requisities are met, login to Azure:
az login

This will open a browser, select your UoP account and enter password.

Once logged in successfully you will then see this message,

You can now close the browser or just switch back to the terminal window. If you have more than one Azure account, they will be listed when you have logged in, as in the example below,

To show all your Azure accounts (Subscriptons) use:
az account list

To select the BRIC subscription:
az account set –n “UoP – Brain Research Imaging Centre”

Once the BRIC subscription is selected you are ready to start your VM.
Start your VM
From the terminal window:
az vm start –-resource-group XXXXXXXXX –-name YYYYYYYY
Where, XXXXXXXXX is the Azure resource group that your VM is configured under. YYYYYYYY is the name of your VM

Stop your VM from Mac command Line
It is essential that your VM is stopped AND deallocated:
az vm stop –-resource-group XXXXXXXXX –-name YYYYYYYY
az vm deallocate –-resource-group XXXXXXXXX –-name YYYYYYYY

Connect to your VM – Command line
From the Mac terminal window use the ssh command, with your VM’s IP address:
ssh Researcher@your.ip.address.here

From a terminal emulator such as Termius, connect to your running VM using the IP address. (Termius can be downloaded from the App store)

If you are familiar with PuTTy on Windows, this is also an option on Mac. Details here
Connect to your VM – Desktop Environment
Requires Microsoft Remote Desktop software package, available from the App store

Once installed you can configure and save connection settings,

Continue if a certificate warning is issued,

Then enter your VM login details,

You will then be logged into the virtual desktop of your VM,

Connect and Access Storage
Access Shared Storage on a VM
Command Line
Based on your defined requirements there will already be a connection to your shared storage account on your VM. From the VM command prompt the df -h command will list filesystem, we are interested in the remote ones which begin with //sauopbric????? as in the example below.

In the first column “Filesystem”, you will see the storage account name and where it can be accessed in the “Mounted on” column.
In the example above we see,
/media/HP-LloH-HV-010622 ( RAW DATA - from scanner in repository REPO0 )
/media/STUDY-HP-LloH-HV-010622 ( STUDY DATA - shared with all involved in study )
/media/MY-DATA ( PERSONAL DATA - personal storage area per researcher )
/media/COMMON-DATA ( COMMON DATA - available to all for sharing files, documents, data, etc. )
Desktop
Access Shared Storage remotely
Microsoft Storage Explorer is free to install on Windows/Mac/Linux from this link
Once installed start the app and add your UoP account, by clicking “Sign in with Azure”

You will need to select Azure,

Then select the BRIC subscription,

Enter your UoP credentials when prompted. Once complete you should see something like below. Note you may have access to more than one subscription. We are interested only in UoP – Brain Research Imaging Centre, untick all others that appear.

Now click on the top icon on the sidebar, navigate to your storage account and the File Shares, from where your will see the data held within your share, and also options to upload or download data

Connect UoP OneDrive to VM
It is possible to connect your UoP OneDrive account to your BRIC VM, however without being selective about which folders are synchronised, it highly likely your VM will not have enough internal disk space to hold all of the data. Below are the steps needed to connect and select which folders are to be available on your VM.
Onedrive should already be installed on your VM, to confirm:
which onedrive
this will show the location of the installed program. ( expect to see /usr/bin/ondrive )
Before connecting configure which folders in your UoP OneDrive account are to be synchronised. Update entries in file:
/home/Researcher/.config/onedrive/sync_list
Which looks like this:
# sync_list supports comments
#
# The ordering of entries is highly recommended - exclusions before inclusions
#
# Exclude everything
!/Your-Foldername1/*
!/Your-Foldername2/*
#
# Exclude secret data folder in root directory only
!/Secret_data/*
#
# Include just the folders you want to see on your VM
/Your-Foldername3/*
/Your-Foldername4/sub-foldername/*
#
Now start and connect to onedrive:
onedrive
Which will prompt you for authorisation. Click the url,

enter your UoP credentials and then copy the resultant url from your browser,

Paste the url back into the waiting command

Now check on the sync status:
onedrive --display-sync-status
When you initially setup OneDrive it will take some time to fully synchronise, but generally will be regularly updaing in the background and should look like this,

From the command line on your VM OneDrive files are found under /home/Researcher/OneDrive,

From the GUI there is a desktop link,

Connect Azure Storage to Mac
In addition to using Azure Storage Explorer as described in the previuos section, it is possible to directly connect an Azure Storage account to a Mac. The extract below is taken from here
Open Finder - Finder is open on macOS by default, but you can ensure that it’s the currently selected application by clicking the macOS face icon on the dock

Select “Connect to Server” from the “Go” Menu: Using the UNC path, convert the beginning double backslash (\) to smb:// and all other backslashes () to forward slashes (/). Your link should look like the following

Use the storage account name and storage account key, (available from BRIC IT support), when prompted for a username and password: When you select Connect on the Connect to Server dialog, you’ll be prompted for the username and password (this will be autopopulated with your macOS username). You have the option of placing the storage account name/storage account key in your macOS Keychain.
Note
Storage Account Keys can be requested from BRIC IT Support.
Use the Azure file share as desired: After substituting the share name and storage account key for the username and password, the share will be mounted. You may use this as you would normally use a local folder/file share, including dragging and dropping files into the file share

Automation
Shutdown of VM
On your Research VM running script /home/Researcher/Shutdown-Deallocate-VM.bsh will shutdown and deallocate your VM in Azure. The script must be run as user Researcher.
It can be run manually or added to the end of your script. It will take a couple of minutes to be processed.
Command Summary
Examples below are using rg-bric-admin as the resource-group name and vm-bric-devtest-1 as the virtual machine name. Replace these with your resource-group and virtual machine names.
Activity |
Command |
|---|---|
Login to Azure |
Connect-AzAccount |
List your Azure Subscriptions |
Get-AzSubscription |
Set to BRIC Azure Subscription |
Select-AzSubscription -SubscriptionId ‘xxxxxxxxxxxxx’ |
Identify your resource group name |
Get-AzVM -Name vm-bric-devtest-1 |
Start Virtual Machine |
Start-AzVM -Name vm-bric-devtest-1 -ResourceGroupName rg-bric-admin |
Stop & deallocate Virtual Machine |
Stop-AzVM -Name vm-bric-devtest-1 -ResourceGroupName rg-bric-admin -Force |
Activity |
Command |
|---|---|
Login to Azure |
az login |
List your Azure Subscriptions |
az account subscription list |
Set to BRIC Azure Subscription |
az account set -s ‘xxxxxxxxxxxxx’ |
Identify your resource group name |
az vm list | grep -i resourcegroup": | tail -1 |
Start Virtual Machine |
az vm start –resource-group rg-bric-admin –name vm-bric-devtest-1 |
Stop & deallocate Virtual Machine |
az vm deallocate –resource-group rg-bric-admin –name vm-bric-devtest-1 |
Activity |
Command |
|---|---|
Login to Azure |
az login |
List your Azure Subscriptions |
az account show |
Set to BRIC Azure Subscription |
az account set -s ‘xxxxxxxxxxxxx’ |
Identify your resource group name |
az vm list | grep -i resourcegroup": | tail -1 |
Start Virtual Machine |
az vm start –resource-group rg-bric-admin –name vm-bric-devtest-1 |
Stop & deallocate Virtual Machine |
az vm deallocate –resource-group rg-bric-admin –name vm-bric-devtest-1 |
Links to other useful resources
A basic introduction to the Linux Commandline
An introduction to Environment and PATH variables in Ubuntu.
Azure Portal login
LAB INFO HERE
Azure LAB user guide
This wiki outlines to steps needed to register, log-in and manage your UoP BRIC student Azure LAB virtual machine. It is very important to read and follow the logout activities detailed at the end. Should you have any questions please contact Paul Greening paul.greening@plymouth.ac.uk
Register for LAB
Your invite to register for an AZURE lab will be via email from Microsoft Azure,

The email will contain a link to register for the lab,

Click the link and use your UoP credentials to log in,

It will take a few seconds to register,

Eventually you will be logged into Azure Lab Services and see the Virtual Machine (VM) you have been assigned,

Note
You can return to your Azure lab at any time using this url My Virtul Machine - Azure Lab Services
Start your LAB VM
To start the VM use the toggle switch to begin booting,

It will take a couple of minutes before becoming available,

Connect to your VM
To connect to your VM, click on the monitor icon,

This provides two options, • RDP - for a GUI desktop environment login • SSH - for command line only login
Select RDP, this will download a Remote Desktop Connection file

Open the downloaded file to establish an RDP connection to your VM,

Just click the OK button.
You are now logged into your VM, the desktop should look like this,

Your VM is running a linux (Ubuntu) operating system. Most activities will be through GUI menus, however as some initial user setup is needed, a basic knowledge of linux commands would be useful. The initial steps to connect your university OneDrive account are detailed below.
Connect your OneDrive account
Open Onedriver, which is accessible from the application menu, under accessories,

Open it, below is how it should look,

Click the + button in the top left of the Onedriver window, and select the mountpoint.
The mountpoint is /home/lab1user/Desktop/Onedrive, see example below:

Select the mountpoint, and you will be prompted to enter your UoP credentials. Accept the permissions.

Once you enter your login and password it will sync to your Onedrive account, which subsequently will be accessible via the Onedriver folder on your desktop.

## YOU ARE NOW READY TO START USING THE LAB AS GUIDED BY YOUR TUTOR ##
Stop your LAB VM
IMPORTANT logout & shutdown instructions – please read.
When your work is complete it is essential to logout of the VM and then shut it down. This will ensure you do not unnecessarily waste your limited hours for this lab. Please follow these steps,
Click on your username (lab1user) in the top right of the session,

Select Log Out,

Back on the Azure LAB services web page, you will see the VM is still running,

It is essential the VM is shutdown using the toggle switch,


URL for your LAB
Once registered you can return to your Azure lab at any time using this url My Virtul Machine - Azure Lab Services